Go from bland to Bond with these easy tips for how to take great photos from inside trains. Consider it your train photography guide, ready to go.

How to Take Better Photos from Moving Trains
Over the years, I’ve taken on plenty of train photography assignments, zooming across rivers, mountains, tunnels and twisting landscapes, camera in hand.
Forget the daily commute, some of the best rail journeys in the world stir the photographic impulse like nothing else on earth. But how do you take good photos from trains?
Since we all travel with a camera these days, even if it’s only our mobile phone, I thought I’d share what I’ve learnt.
Here are my 17 tips to take better photos from a moving train
Inside Train Photography Guide
1) Prepare to look like a fool
Yes, I know I lured you in with talk of James Bond but in reality you’re just going to look… strange. Deal with it and move on.
While taking photos of a beautiful sunset makes you blend in with the crowd, taking photos from a train will attract stares. Don’t let them put you off. Throw shame out the window and click on.
2) Don’t get in anyone’s way
Unless you’re the paparazzi (in which case you won’t care) this should apply for all photo situations really. Don’t be a wallflower, put yourself where you need to be, but don’t become a nuisance.
Why? Well, beyond general human decency there’s some self-interest at stake here too. Rules concerning taking photos on trains are sometimes complicated (if in doubt, check them out) but trouble usually results from misinformed paranoia.
Avoid getting entangled in a conversation with a guard or member of the police by behaving with respect to everyone around you and not shoving a lens in their face (unless they smile and pose, in which case, game on!)
3) Sit on both sides of the train
It’s difficult to tell where the great scenery is going to appear. In an ideal world you’d take the journey twice to get the perfect shot. Or find a source who can tell you in advance where the best bits are. Bet let’s face it, that’s unlikely for most of us most of the time.
Far better is to look around when you get on the train and search for a spot where you can run from left to right as fast and as often as needed. And yes, see point one again for what you will look like while doing this.
4) Don’t use flash
Turn it off. Even “non fancy” cameras like iPhones and point and shoots usually let you silence this beast. Flash can only reach a metre or so and so there’s really no point*. You’re shooting for the scenery beyond right?
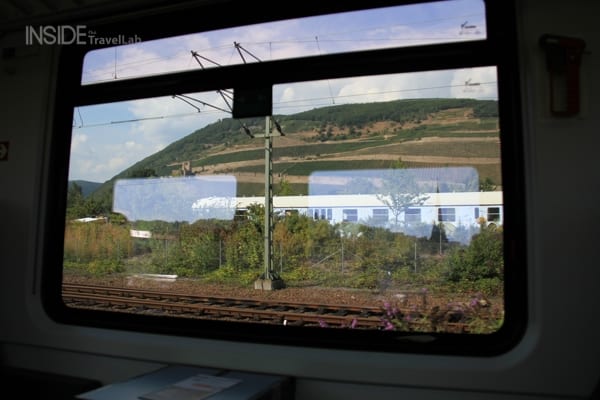
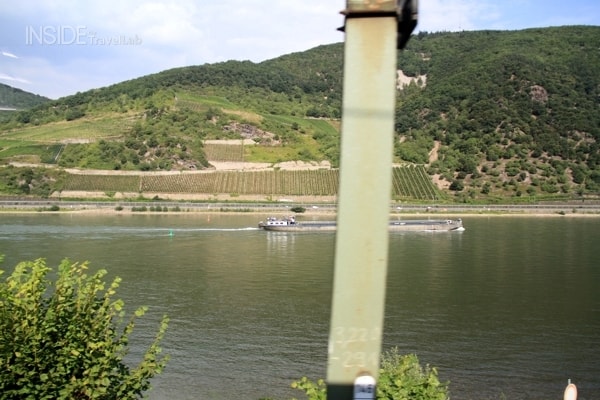
5) Avoid the Glass
Glass windows reflect patterns from inside the train and the muck on their surface will ruin your shot. In the old days, this used to be easy: you could just pull down the window. Nowadays, I’ve noticed more and more trains have fixed windows for some spurious reasons like stopping people splattering their skulls against a tunnel while they were concentrating on taking a photo.
But if you can, find the option for shooting into thin air. It removes so many problems. Just make sure your camera is attached to your body and that you don’t splatter your skull against a tunnel because you’re too busy taking a photo…
You might need to use the best camera for backpacking to snap pics free of any signs of blur and reflections instead.
6) Embrace the glass
But I thought you just said…
If you can’t get rid of it, you’re going to have to work with it. Get your lens flat against the glass. Don’t dilly-dally about getting close-ish to it. Get right up against it. I could explain why this helps. But then I’d have to kill you…
6) Cover the furniture
The biggest culprits for reflections in glass are usually brightly coloured tables, arm rests and clothes (usually yours.) Travel with a couple of black jumpers (sweaters? US?) to cover up these pesky objects. And heretofore return to point one…
7) Be Ready
This kinda applies to all photography but it’s especially important here. What does ready mean?
8) Lens cap off
9) Battery charged – spare available
10) Fresh, clean memory card – with spare available.
You don’t want to be scrabbling about for these things. You need them right there, ready to go. Passengers take a dim view of you pulling the emergency cord just because you want to go back and have another go at the right shot.
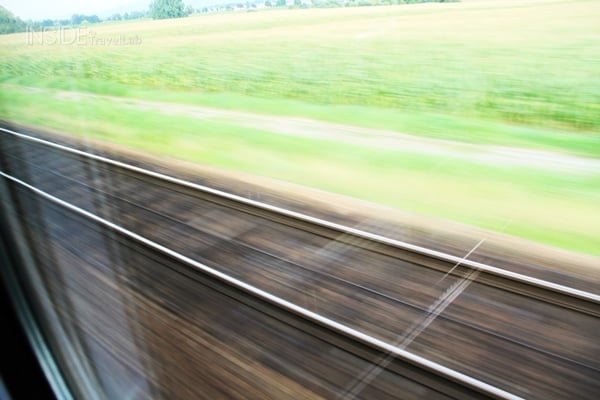
11) Shoot Fast
If you can, set your camera to take as many photos as possible with the shutter button held down. Why? Well, things change fast. And you want to see this don’t you:
Not this:
The difference is less than a second…
12) Shoot faster
Switch your camera to action mode if you have it (usually the athlete caught mid stride) or better yet get out of auto altogether and use manual settings.
It obviously varies but a good rule of thumb is a shutter speed (Tv is shutter priority on most cameras) of 1/2000 for crisp scenery shots and 1/750 for blur but not too much blur. Start with those and play around.
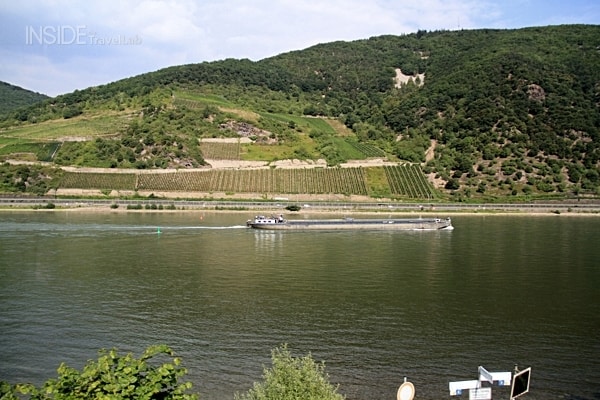
13) Get the weather right
Tricky to control, even for Bond. But moody and overcast is better than sunshine or rain. Too much sun will drive you crazy with shadows and reflections. And rain? Well rain will quickly smudge itself across either the windows or your lens. Most of the time if you’re on the road, you won’t have the chance to avoid this. But if you do have the choice? Aim for the clouds.
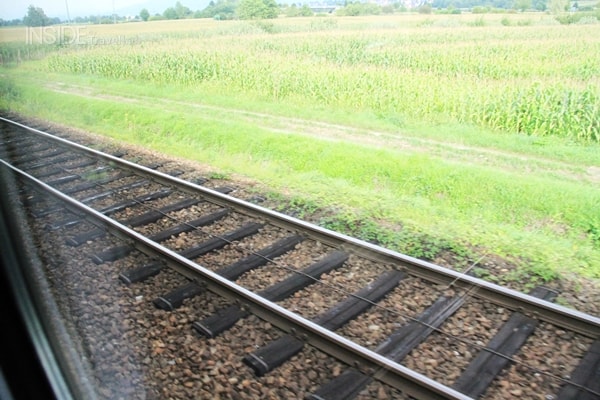
14) Don’t forget the rule of thirds
This standard photography chestnut works just as well when shooting from a train. Can’t quite remember what it is? Divide the frame you’re shooting into thirds horizontally and vertically and aim to get the most “interesting” point of your shot where the lines intersect.
If you’re able to lean out (or stand on the station) then the point where the parallel tracks reach a point works well. If you’re confined by glass then make sure not to put your horizon in the middle. Aim for a third.
Need more information? Check out this article on the photography rule of thirds here.
15) Build a tripod
Moving trains, well, move. And bumps and jitters aren’t good for photographs. Steady your camera as much as you can by resting your elbows on the windowsill and table and bracing your back against the seat or the wall. If forced to stand, do the same thing but keep your knees bent to absorb the shocks that way. Yes, I know. Return to point one.
16) Take a break
It’s easy to go a little goggle-eyed and become travel sick with all those focus on moving objects. Take lots of little short breaks to look around or just close your eyes long before you hit this stage. Your temples will thank you.
17) Stand at the back of the train
I have to thank Ralph Velasco for this one. From the back of the train you have a chance of catching the rest of the train curving in front of you if you’re able to lean out the window. Which, let’s face it, looks cool.
And kind of like something you’d see in a James Bond film…Maybe.
How to Take a Photo of a Moving Train
Ah, so you’re not ON the train. You want to take a better photo OF the train as it whizzes past. OK. So, work out whether you want…
- The foreground in focus, with the train a blur
- The train nice and crisp, the background scenery blurred
- Everything in focus
- Nothing in focus/big blobby mess.
For option one. Get your camera very, VERY still. Use your body as a tripod or actually use a tripod. Set a longish shutter speed so that the movement of the train is blurred. Make sure the person or object in your foreground can stay still for this time.
Option two. Choose a fast shutter speed and practice swooshing your camera around to mimic the movement of the train. The idea is that you move in time with the train, blurring the background and keeping the train in focus.
This takes a bit of practice. Steady your body as much as you can, press the camera tight against your face and spin on your heels.
For option three, you need a fast shutter speed and good reflexes. And for number four.. C’mon now!
How about you? Do you have any tips for taking photos on a train?
*Never say never. There are some exceptions. But for most people, most of the time: never.


Great site I have just booked Transiberian train trip st petersberg to Beijing looking for best camera or new lens any suggestions
Oh – that sounds wonderful! It’s a journey I’d love to do some day. I’m very happy with my Canon 7D but it’s a bit on the heavy side if you’ve only a passing interest in photography.